Welcome to an exciting journey in the world of Minecraft modding! Today, we’re diving into the installation and usage of the DarkSmithing mod. This mod allows players to create gorgeous armor trims through an engaging smithing process. If you are a fan of customizing your gear, this guide will help you get started with DarkSmithing and explore its incredible features!
Installation of DarkSmithing
To begin utilizing DarkSmithing, you’ll first need to install the mod correctly. Here’s a step-by-step guide to help you along the way:
 Recipe Ingredients
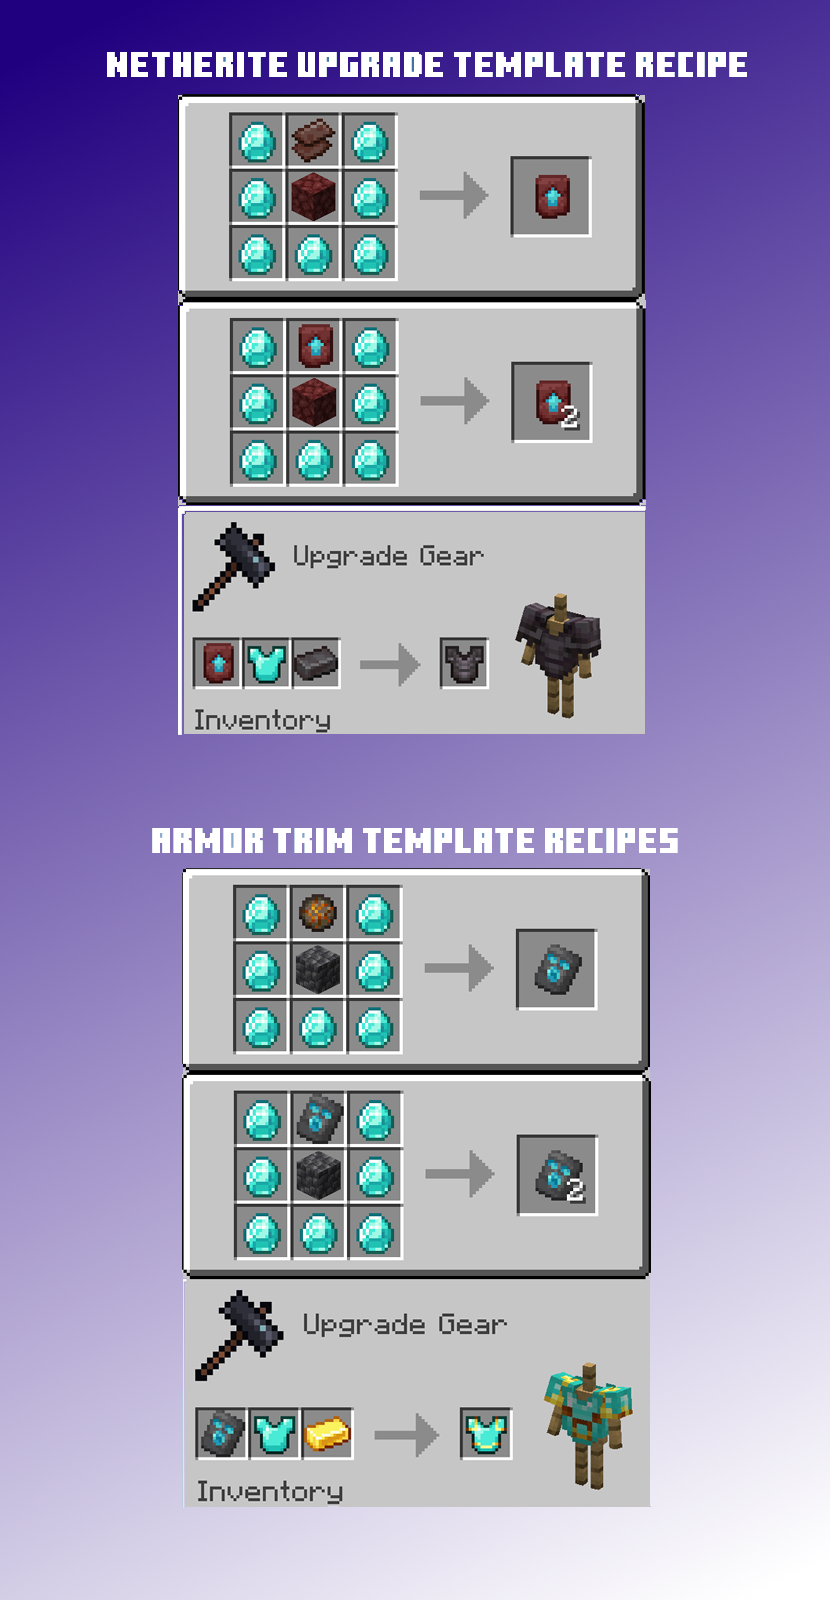
Once you have DarkSmithing installed, you’ll need the following ingredients to start crafting your armor trims:
- 1x Smithing Table
- 1x Diamond
- 1x Gold Ingot
- 1x Leather
- Various Trimming Materials (like dyes, gems, etc)
Instructions for Crafting Armor Trims
Now that you have your ingredients ready, follow these instructions to create beautiful armor trims:
- First, ensure that you have a Smithing Table set up in a safe location.
- Open the Smithing Table interface, where you will see multiple crafting slots.
- Place your base armor piece in the left slot of the Smithing Table.
- On the right, add the materials you gathered along with any dye for color adjustments.
- Carefully select the type of trim you wish to apply from the available options within the mod.
- Finally, click on the resultant item to complete the process, and your newly trimmed armor piece is ready to enchant!
Crafting with DarkSmithing is a great way to personalize your Minecraft experience. Not only does it enhance the visual appeal of your player’s armor, but it also adds an element of uniqueness to your gameplay. Enjoy experimenting with different colors and materials! Happy crafting!
Effective Snout Armor Trim Recipes for Pets
source = www.curseforge.com